This is a guest post by Lincoln, a solar installer
So you’ve had solar installed – the system is running and your bills appear to be lower, but is that it?
This article runs through a few key factors that separate a good install from a shoddy install and whether your solar installer has added value to your home or set a ticking time bomb for a future headache.
If you haven’t bought a system yet, this article will explain to you the difference between a quality install by a reputable solar professional, and a cheap install by a bill-buster backpacker crew.
Licensing
As with any works performed in Australia, all solar work is legally required to be installed by a licensed electrician with an attached CEC-accredited license. The first step is to ensure that the company doing your install is both licensed and insured – the protects you and your home in the event of anything going wrong and prevents you being added to the list of casualties of homeowners who have been caught out by using unlicensed tradespeople to do electrical work on their home.
Anything solar requires a Clean Energy Council Accreditation and this ensures that the electrician has gone through the required courses and is properly educated on the correct installation procedures of solar systems. After all, you’re placing your home in their hands and solar is a major electrical upgrade that should not be taken lightly.
A quick check before the work goes ahead prevents a mighty headache in the future.
Signage
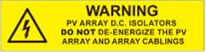
Firstly, there should be appropriate labelling and identification on the inverter, switchboard and isolating switches. An acceptable form of signage may include the stickers in the picture below.
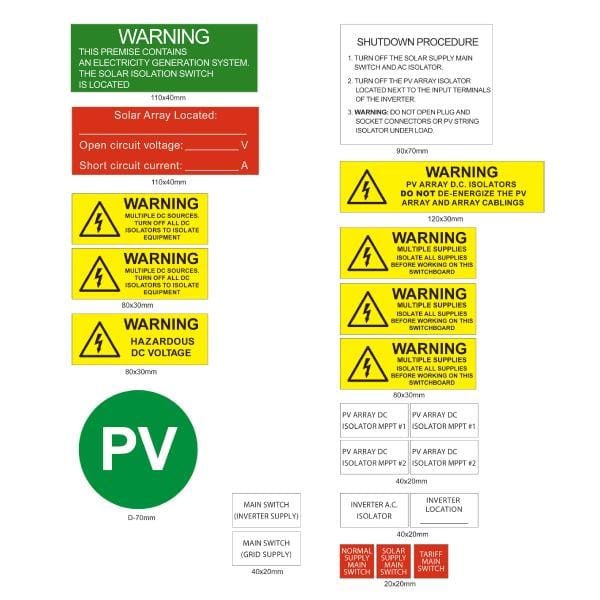
On the inverter you should be able to see:
A clear warning placard with a detailed shutdown procedure

A warning about disconnecting DC cables without isolating
If there’s more than one MPPT used
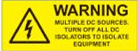
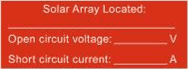
On the switchboard you should be able to see:
Clear labels for your main switch (Grid supply) and main switch (inverter supply)

![]()
Solar array open circuit voltage and current
A green PV Sticker on the outside of the switchboard

These labels ensure, in the case of an emergency, appropriate actions can be taken – for example, if there was a house fire, a firefighter can quickly be made aware of the existence of a solar system, the size (and danger) of it, and locate the correct isolators to disable it.
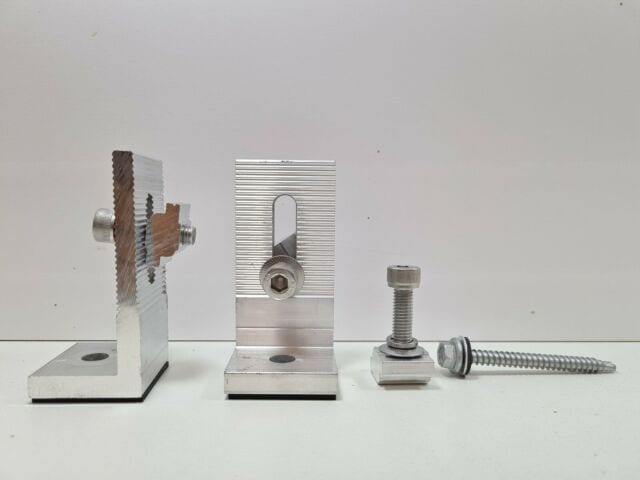
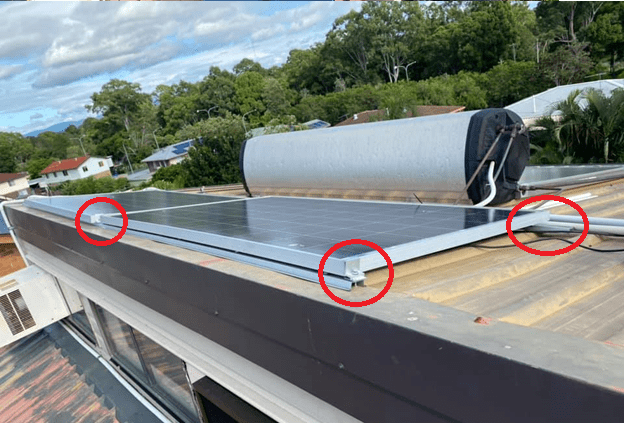
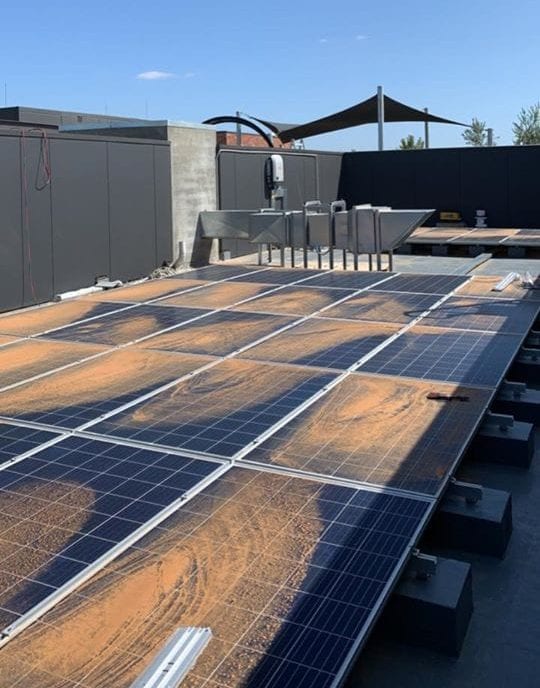
Racking
Racking is the essential part of the solar system that holds the panels to the roof. Comprised of mids, ends, rail, and tin or tile feet depending on your roof type, the install quality of your racking will be an important indicator of whether or not your panels will stay bolted to the roof for the next twenty years or blow away in the next storm. A poorly installed racking system can also result in nasty water leaks – no one wants to wake up with a gentle drip of water on their forehead! See our solar racking page for more information about different types of racking systems.
Roof Penetrations
To ensure your roof is adequately protected, whether tin or tile, it’s important that the part of the racking that is penetrating the roof is installed correctly.
On a tile roof, one of the most important things to look at is that the tile has been correctly ground down to sit flush back on the roof after the foot has been installed.
Once a tile foot has been screwed into the truss, it is essential that the tile that it sits under is shaved back, otherwise a substantial gap is left that will result in a water leak.
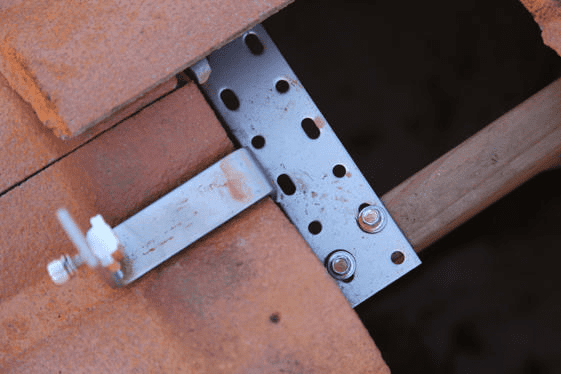
Similarly, on a tin roof, it is crucial that the tin foot is installed with a rubber spacing underneath it. Generally the existing screw is taken out and replaced with a new screw and rubber foot. As such, it’s important that the rubber foot is in place to prevent water ingress.
GI Energy only uses Clenergy – a marine-grade aluminium cyclone-rated racking system with a 10 year warranty.
Aside from this, another point to check is the rigidity of the system. It should all be bolted down and locked in place – give a panel edge a jiggle. It should feel solid and not flex around in place. Loose panels or missing clamps directly affect the integrity of the install.
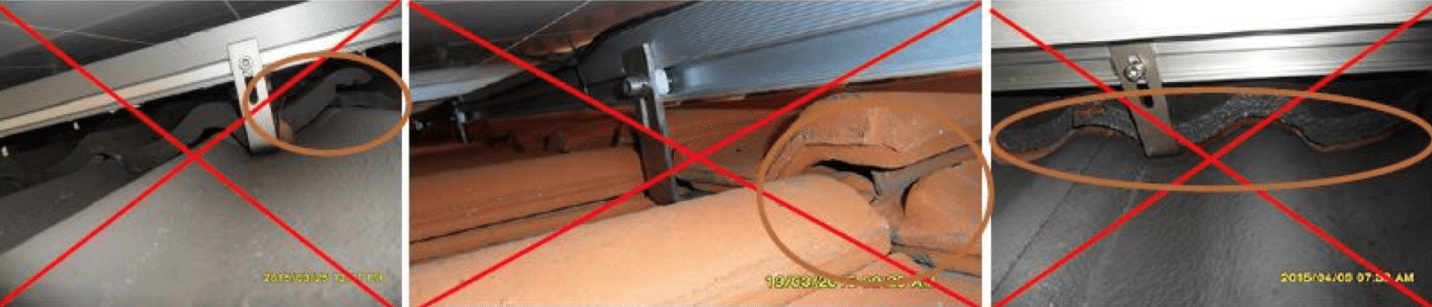
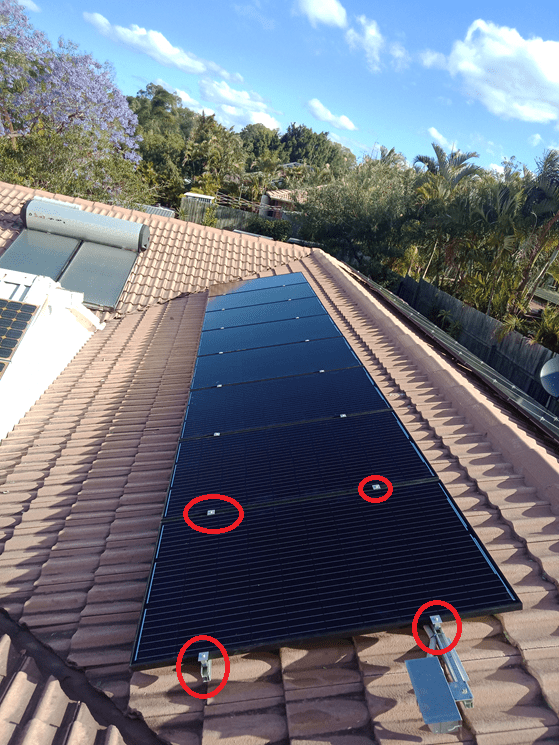
Clamping Zones
This leads to the next point – clamping zones.
Any installer worth their salt will understand the importance of clamping zones.
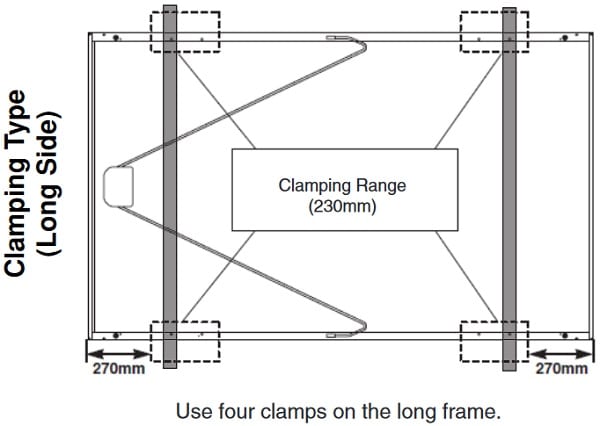
Clamping zones indicate the best location for clamps to clench on the panel as this mitigates panel flex under high wind conditions and ensures your system will last during stressful weather events.
This one brings joy:
This one does not bring joy:
Let’s have a look at panels next.
Panels
Have you ever seen those panels that look like they’re designed by Hot Wheels? You know the ones I’m talking about – launch ramps for outer space..
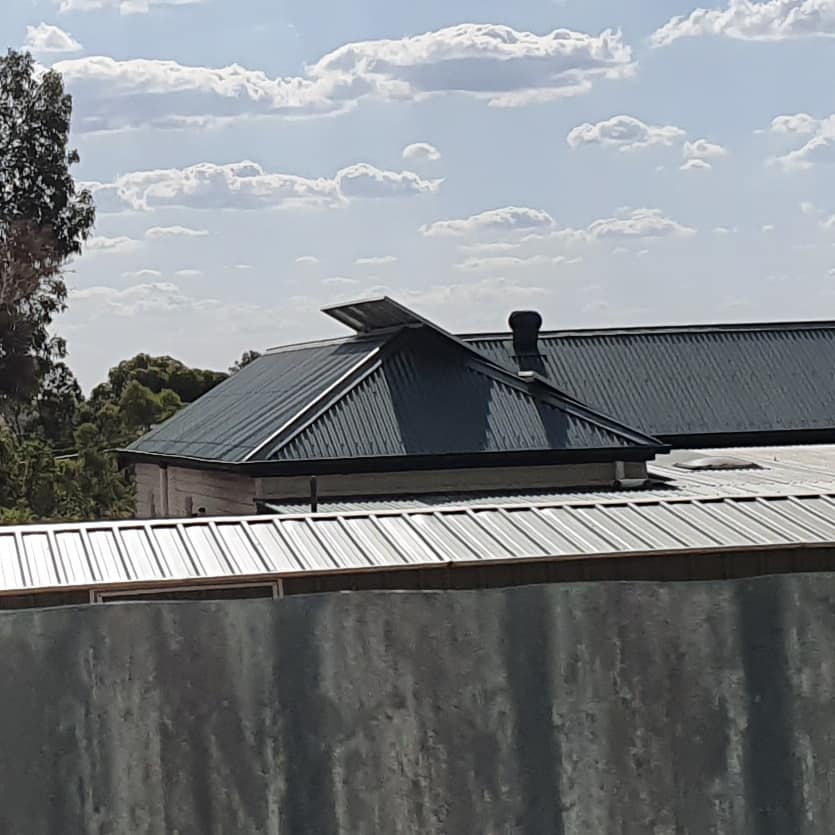
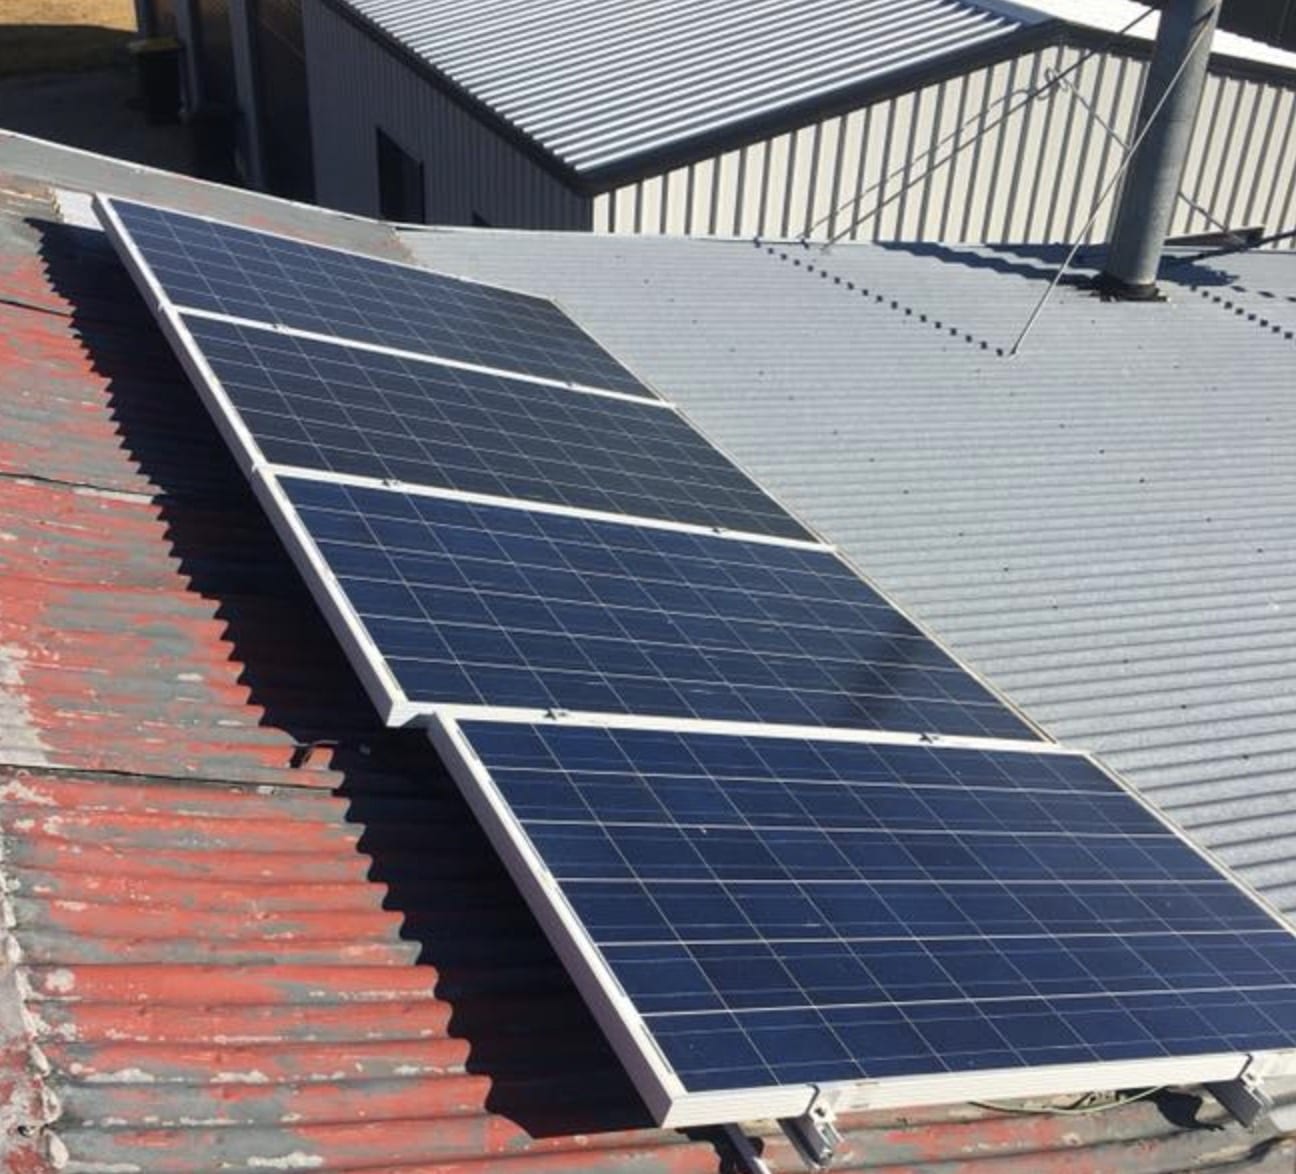
Not only is it a hazard, it’s incorrectly installed. In fact, there are requirements in relation to how close panels can be to the ridge line and gutter line of your roof. These are called ‘exclusion zones’ and are protection for your solar system from wind.
In Australia, wind zones are graded A, B, C and D with A being least severe all the way up to D being most severe.
Exclusion zones are generally classified by the racking manufacturer’s guidelines but a good rule of general practice is at least 20cm from the edge of the gutter line and roof line all the way around.
A gap on the gutter line also allows for water runoff, especially during heavy rain. An insufficient gap will cause the water to ‘sheet’ off the roof and you’ll get a nice little waterfall going straight over your gutter.
Panel Alignment
Next up is panel alignment – this one’s more of an aesthetic thing but still relevant to the installation – you’re paying for a service and it’s the little things that add up to make a professional install. Especially where you can see your panels from the street or backyard, you want to be certain that you’re looking at a neat, tidy job. Forking out a significant sum for your solar system means you’re paying for it to look good too.
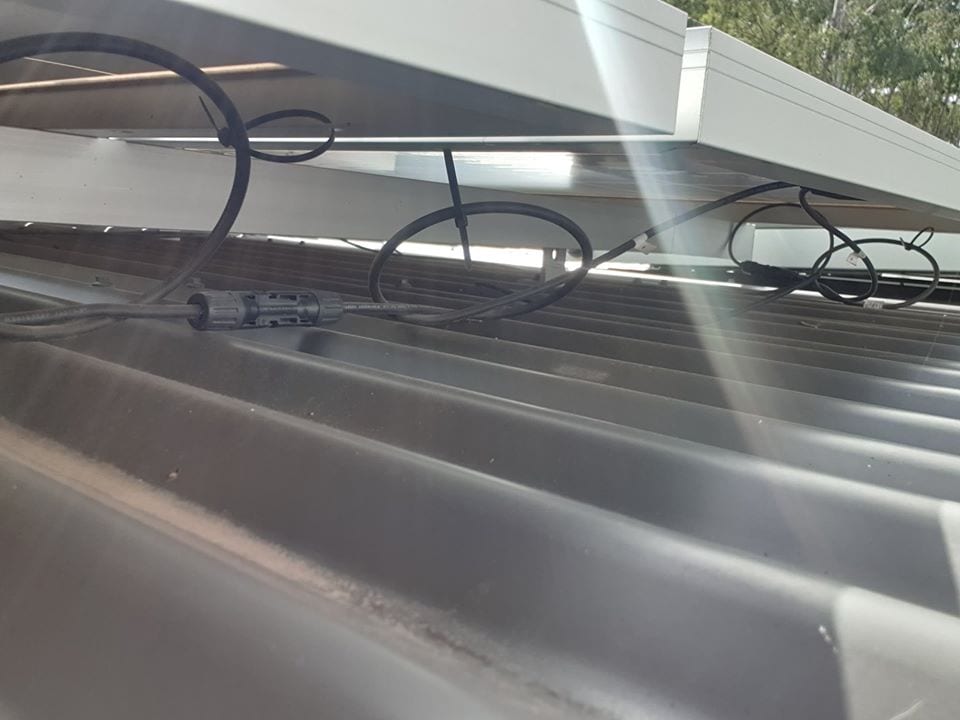
Wiring
DC cable has a bit more character than your standard house wiring. The cable is, by design, more resistant to cuts and corrosion and built stronger. DC cable carries higher voltage and lower current and due to the nature of inverter technology, DC cable is generally not RCD protected. While there is still a circuit breaker in place, if your cabling has been installed in a potentially dangerous way in or on your roof, this can lead to hazards such as fire or electricity arcing.
What’s the difference between an RCD and a CB? http://www.firstcallelectrical.com.au/info/whats-the-difference-between-a-safety-switch-and-a-circuit-breaker
If you’re able, you can hop in the roof and check the cable run from the inverter to the solar panels on the roof. All DC cabling should be installed in HD solar conduit or appropriately mechanically protected. The conduit should be clearly labelled as DC solar conduit as well as being appropriately held in place by saddles or straps.
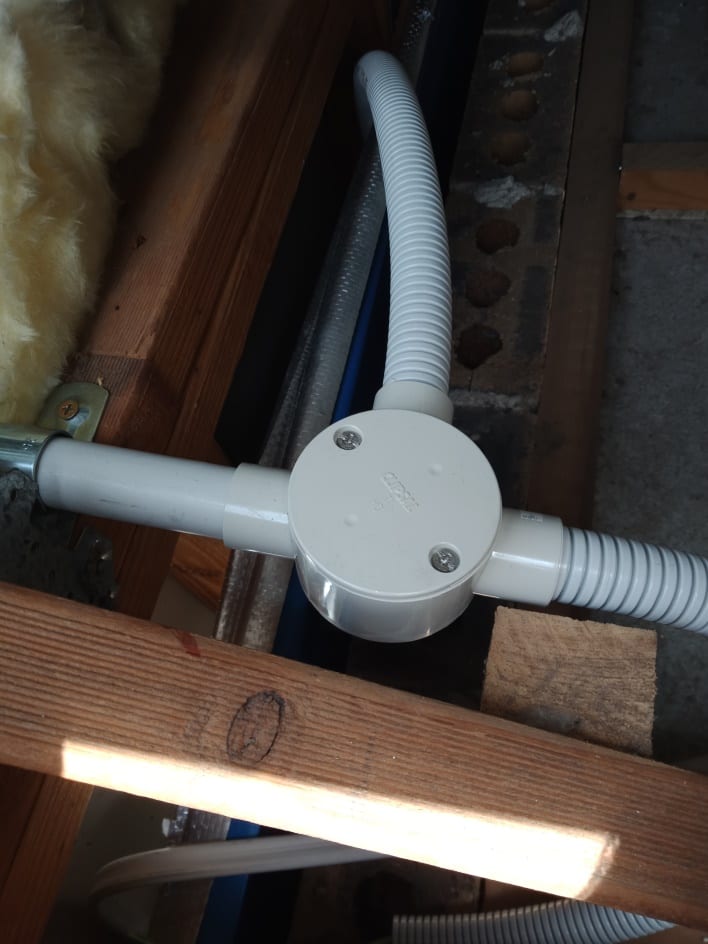
Protecting your cable runs with heavy-duty conduit vastly reduces the risks of damage to the cabling.
Next is the roof penetration through to the solar panels – a common area for water ingress is the penetration that allows access for the conduit up to the solar panels on the roof. A recommended form of roof penetration is through the use of a Dektite.
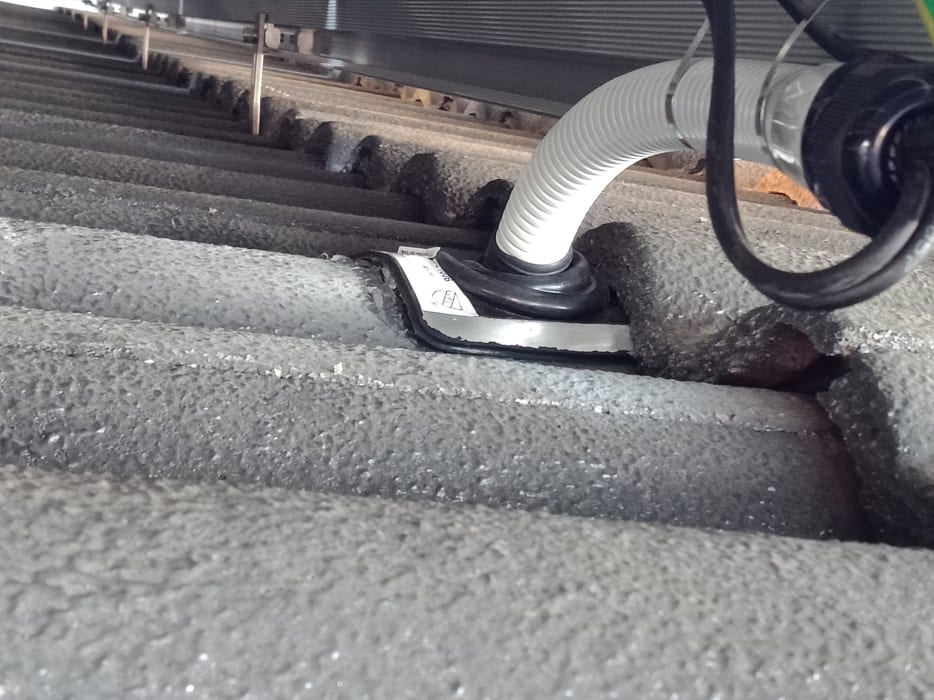
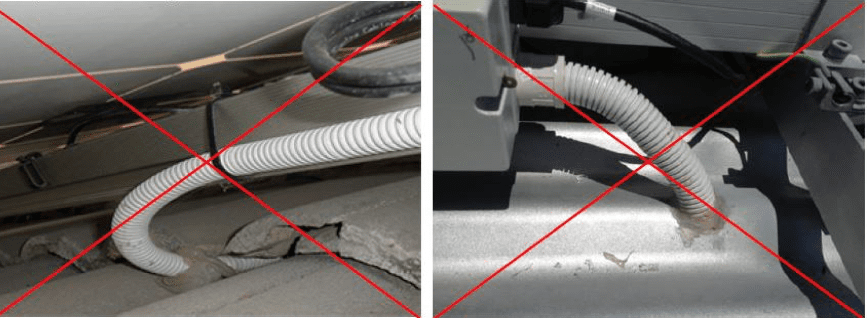
The Dektite should be installed with a clean bead of silicone and a visible amount of conduit protruding onto the rail on the roof, and preferably under a panel to protect it from the sun’s UV rays.
Directly out of the Dektite should be a nice clean fixing to the rail with no sags or bends. The leads to the final part of the cable run.
Cable sag on the roof will lead to early degradation of the cables and is generally an indicator of a poor installation. A degrading DC cable is dangerous as it will eventually arc and potentially cause a fire – on a tin roof this can even result in the roof becoming electrically charged – shocking!
Shading
One of the most critical parts of your installation is the shading on the panels. With the way that DC solar operates, any panel that has even a slight amount of shading on it is going to suffer decreased performance greater than the amount of shading. While it certainly seems like the best way to crush a bill is to put as many panels as you can on your roof, if you have any large trees or buildings that will shade panels or areas of your roof, it’s more likely that you’ll be paying extra for reduced performance.
It may be likely that panel shading may only occur at some times during the day while being in full sunlight for the majority of the day. In cases like these, you may need to invest in optimisers that will benefit you the most in the event that you have any shading on your roof.
Ask us how we design your system and we can discuss options to best negate your shading issues!
Panel Maintenance
Finally, panel maintenance plays a big role in the efficiency of the system. Cleaning a panel set of dirt and keeping it free from leaves and debris will ensure the panels operate at continued efficiency. Since shading and dirt go hand-in-hand in terms of operating efficiency, it makes sense to make an effort to keep the panels clean and happy!
Let’s move down to the inverter!
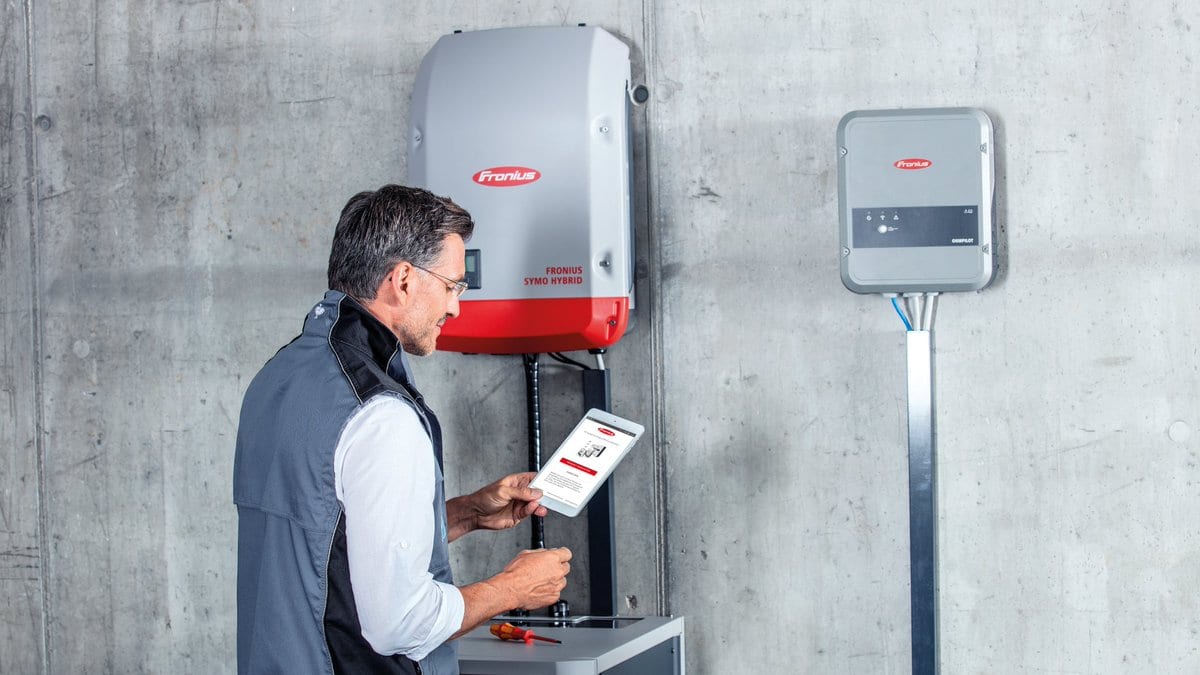
Inverter
The inverter is the brains of the system – the beast that transforms the voltages and converts the sun’s energy from DC solar power into AC house power and turns that sizzling power bill into a fizzled power nil. In that respect, it’s the single most important part of the solar installation and it’s of utmost importance that the inverter is installed correctly in a well-ventilated area free from dust and water ingress.
Inverters installed to manufacturer standards will generally have an exclusion zone around them to allow for heat dissipation, as well as a required location to allow for their IP rating to stay relevant.
In areas located close to the sea, corrosion can also be an issue and will require the inverter to be placed in a location that keeps it safe from the sea spray.
Another important thing to consider is the location of the inverter in relation to sun. A good installer will work to avoid walls that experience large amounts of sunlight on the basis that the sun will cause heat rise in the inverter. Inverters will automatically clip performance based on increased heat and will also end up with a faded screen after a couple years – UV ruins everything!
Commissioning
In the interest of keeping up with the expanding industry technology surrounding solar, inverters have progressed to beyond the process of simply turning an inverter on and letting it go. There are a bunch of factors that go into a properly commissioned inverter and if you’re running a system that uses a high-end inverter like a Fronius, there are things you’re going to want to check to ensure that your system has been set up to operate in the most efficient manner possible.
While it is difficult to check these things yourself, having a chat with the installer on the day about what is being set up on the inverter can lead to a much greater understanding of your system and its health.
Inverters are highly complex and can be the difference between your 5kw inverter running at 98.7% or at 66.7% efficiency. With an investment around the same cost as a small used-car, it makes sense to be properly educated and make the right choices in your decisions in regards to who, when, why, where, whum, whoo, whem, ehwuewrwer
Conclusion
By placing an emphasis on educating our clients in regards to their solar investment, it’s more likely that you will experience a higher energy saving as opposed to simply expecting the system to run and waiting for it to break down. Understanding your solar and whether it’s operating efficiently is a great way to move greener and save money on your bill. Looking for and noting potential issues in the system and educating yourself on these can potentially limit future issues and ensure you’re future-proofing and limiting headaches down the track.
Some other useful links:


